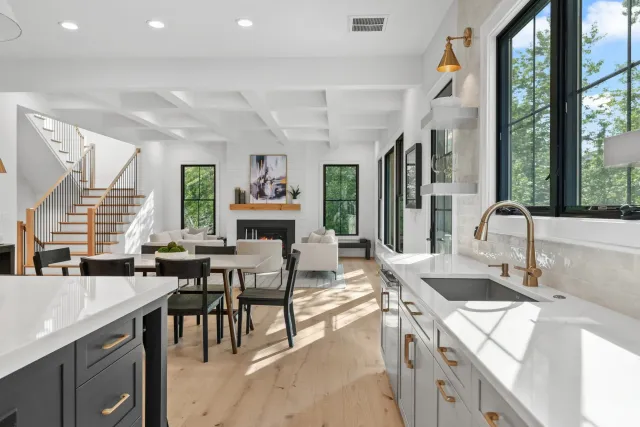
You’ve seen the stats: listings with video get 403% more inquiries than those without. But not all video is created equal. A shaky iPhone walkthrough can hurt your brand more than no video at all, while a well-produced property video can become the single most powerful marketing asset in your listing toolkit.
The challenge is finding the right videographer. Real estate video is a specialized skill — the person who shoots weddings or corporate events isn’t necessarily the right fit for showcasing a 4-bedroom colonial. Here’s how to evaluate your options and make the right call.
Why Video Matters More Than Ever for Listings
Photos stop the scroll. Video closes the deal.
When a buyer watches a property video, they experience the home’s flow — how the front door opens into the foyer, how the kitchen connects to the family room, what it feels like to walk from the primary suite to the backyard. That spatial storytelling is something photos simply can’t replicate.
The impact is measurable:
- Listings with video receive 403% more inquiries than those without
- Homes with video tours sell up to 20% faster
- 73% of sellers say they’re more likely to list with an agent who uses video
- Video listings get 87% more views on real estate portals
For agents, video isn’t just a marketing upgrade — it’s a listing presentation advantage. When you show sellers your video strategy during a listing appointment, you’re demonstrating a level of professionalism that sets you apart from agents still relying on photos alone.
Types of Real Estate Video (And When to Use Each)
Before you hire a videographer, know what you’re asking for. Different video types serve different purposes:
Walkthrough Tours
The bread and butter of real estate video. A stabilized camera moves through the home room by room, giving buyers a realistic sense of the space. Best for: most residential listings where you want to showcase layout and flow.
Cinematic Lifestyle Videos
These go beyond the property itself. They incorporate neighborhood footage, lifestyle moments, music, and storytelling to create an emotional connection. Best for: luxury listings, new construction, and agent branding where you’re selling a lifestyle, not just square footage.
Drone and Aerial Video
Aerial footage puts the property in context — lot size, proximity to amenities, neighborhood character, and natural surroundings. Best for: properties with acreage, waterfront homes, homes near parks or downtown areas, and any listing where location is a major selling point. Learn more about our drone photography services.
Social Media Reels
Short, punchy vertical videos optimized for Instagram Reels, TikTok, and YouTube Shorts. These aren’t property tours — they’re attention grabbers designed to drive traffic to your full listing. Best for: building your brand, generating leads, and reaching buyers who start their home search on social media.
How to Evaluate a Real Estate Videographer
1. Look for Real Estate-Specific Experience
This is the single most important factor. Real estate videography is fundamentally different from other types of video production:
- Pacing needs to be deliberate but not slow — buyers lose interest after 90 seconds
- Lighting must handle mixed indoor environments (windows blowing out, dark corners, mixed color temperatures)
- Movement has to be smooth and intentional — every camera move should reveal something new
- Editing should be clean and professional, not stylized or trendy
A videographer who primarily shoots weddings or events may produce beautiful work, but their instincts about pacing, framing, and storytelling won’t translate directly to real estate. Ask specifically: How many properties have you filmed in the last 6 months?
2. Study the Portfolio — But Look Deeper
Everyone’s highlight reel looks good. Here’s what to actually evaluate:
- Consistency across properties: Can they make a $300K starter home look as compelling as a $2M estate?
- Lighting quality: Are rooms well-lit and natural-looking, or harsh and artificial?
- Smooth movement: Watch for shaky footage, jarring transitions, or dizzying speed
- Audio and music: Does the music match the property’s character? Is it properly licensed?
- Opening shots: The first 3 seconds determine whether a buyer keeps watching — are they compelling?
3. Ask About Equipment
You don’t need to be a gear expert, but knowing the basics helps you evaluate professionalism:
- Gimbal stabilizer (like DJI RS series) — essential for smooth walkthrough footage. If they’re handheld-only, keep looking.
- Drone — should be FAA Part 107 certified for commercial use. Ask to see their certification.
- Professional lighting — particularly important for interior shots. Natural light alone rarely produces consistent results.
- Professional editing software — Final Cut Pro, Adobe Premiere, or DaVinci Resolve are industry standards
4. Evaluate Their Storytelling Instinct
The best real estate videographers don’t just point a camera at rooms — they guide the viewer through a narrative. Watch their videos and ask yourself:
- Does the video have a natural beginning, middle, and end?
- Do you get a sense of how the home lives, not just what it contains?
- Are the best features highlighted without feeling forced?
- Would a buyer who watches this video want to see the home in person?
5. Confirm Turnaround and Workflow
In real estate, timing is everything. A video delivered two weeks after the shoot misses the critical first-week listing window. Clarify:
- Standard turnaround time — 48 to 72 hours is the industry benchmark
- Rush availability — can they deliver in 24 hours when needed?
- Revision process — how many rounds of edits are included?
- Delivery formats — do they provide versions optimized for MLS, social media, and website?
What to Expect During a Shoot
A typical residential property video shoot takes 1 to 2 hours on-site. Here’s how to prepare:
Before the shoot:
- Stage every room as you would for professional photos
- Turn on all lights and open blinds/curtains
- Remove personal items, clutter, and vehicles from the driveway
- Confirm the shot list with your videographer (key features, preferred flow, any rooms to skip)
During the shoot:
- The videographer will typically walk the home once before filming to plan their path
- Expect multiple passes through key rooms from different angles
- Drone footage is usually captured first or last, depending on lighting conditions
- Stay available for questions but let them work — a good videographer knows what they need
After the shoot:
- You’ll receive a rough cut or first edit within the agreed turnaround window
- Review on multiple devices (phone, desktop, tablet) since buyers watch on all of them
- Provide specific feedback if changes are needed — “the kitchen feels dark” is more useful than “I don’t love it”
Getting Maximum ROI From Your Videos
Creating a great video is step one. Distributing it effectively is where the real value comes from.
On your listing:
- Upload directly to MLS (most now support video) — don’t just include a YouTube link
- Feature the video prominently on your listing page, above the fold
- Use the video thumbnail as a featured image where platforms allow it
On social media:
- Post the full video to YouTube and Facebook (both favor native video in their algorithms)
- Cut 15-30 second highlight reels for Instagram Reels and TikTok
- Use the video in targeted ads to reach buyers in your market area
- Tag the neighborhood and use local hashtags to increase discoverability
In your listing presentation:
- Show sellers sample videos during listing appointments to demonstrate your marketing approach
- Include a “video marketing” slide in your pre-listing pitch
- Share completed videos with sellers so they can promote their listing to their own networks
For your brand:
- Compile property videos into a portfolio reel for your website and social profiles
- Use behind-the-scenes footage from shoots in your agent branding content
- Repurpose neighborhood footage across multiple listings in the same area
Red Flags to Watch For
Not every videographer who says they do real estate is worth hiring. Walk away if you see:
- No real estate work in their portfolio — general “we can do anything” claims without proof
- No stabilizer or gimbal — handheld footage screams amateur
- Turnaround longer than a week — your listing can’t wait that long
- No FAA Part 107 drone certification — operating without it is illegal and puts you at liability risk
- Music licensing issues — using popular songs without a license can get your video taken down or result in legal issues
- No contracts or clear pricing — professionals have standard packages and written agreements
Build Video Into Your Standard Listing Strategy
The agents who consistently win listings are the ones who present sellers with a comprehensive marketing plan — and video is a central piece of that plan. When sellers see that you invest in professional video for every listing, they understand you’re serious about getting their home sold quickly and for the best price.
Start with walkthrough tours for every listing, add drone footage for properties where location matters, and layer in social media content to build your brand over time. The compound effect of consistent video marketing is more listings, more referrals, and a stronger reputation in your market.
Ready to add professional video to your listings? Explore UMedia’s videography services and see what a difference it makes.